Need help in using our WordPress theme?
To create a new event, follow the steps:
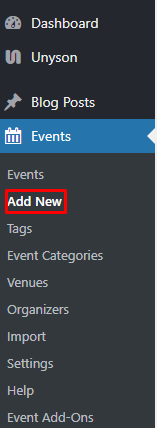
Step 1 - To start creating an event, on your Dashboard navigate to Events > Add New. The Add New Event page will show.
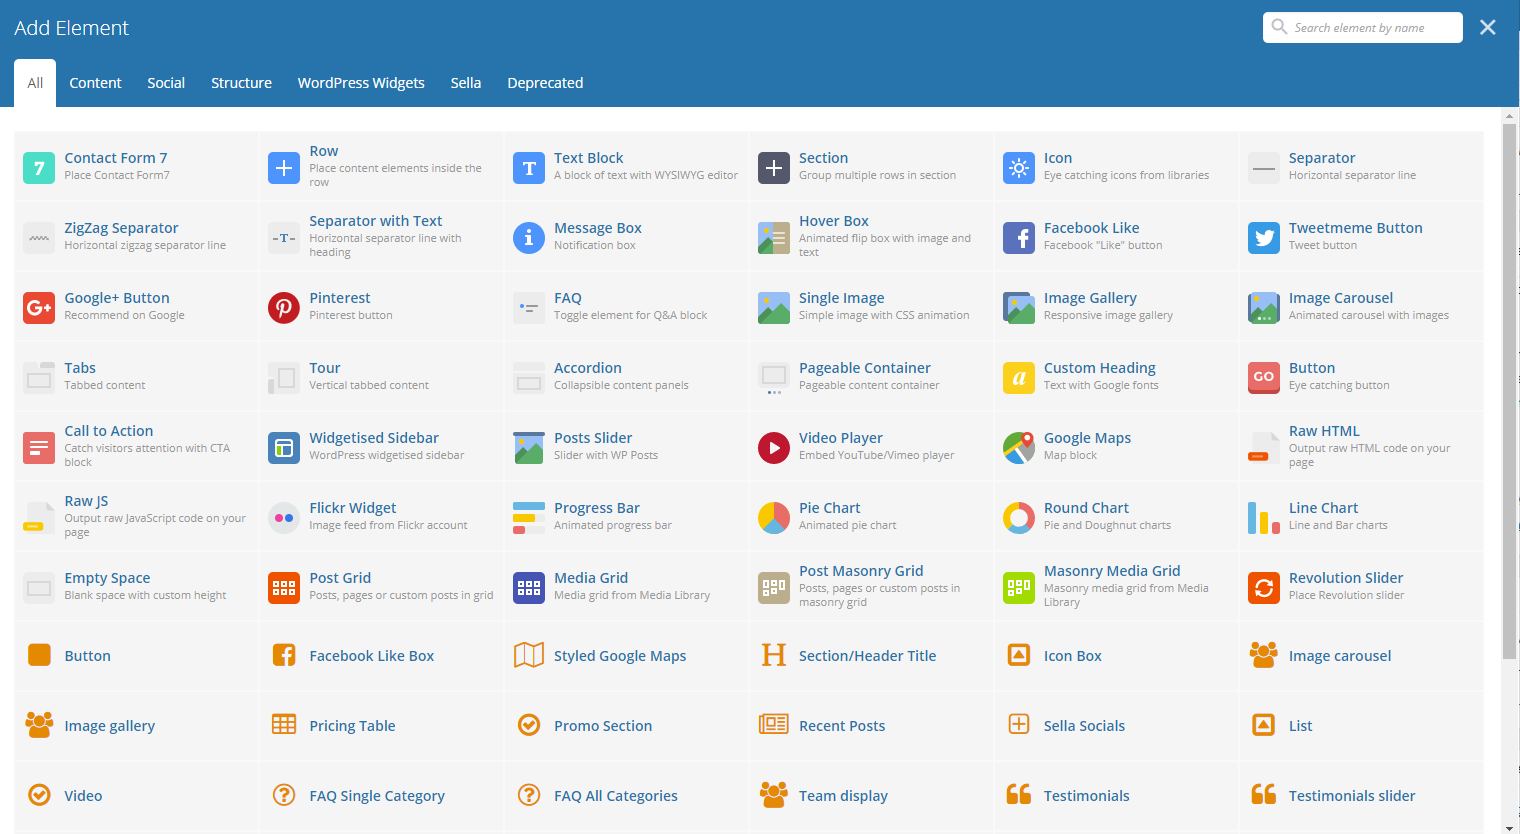
Step 2 - Once your in the Add New Event page, you can add details about the event like title, pictures, videos, pricing, etc., to help with the promotion of the event. You can use the Elements in Sella to customize it to your liking.
Step 3 - This are the needed information for the event, you can add the details.
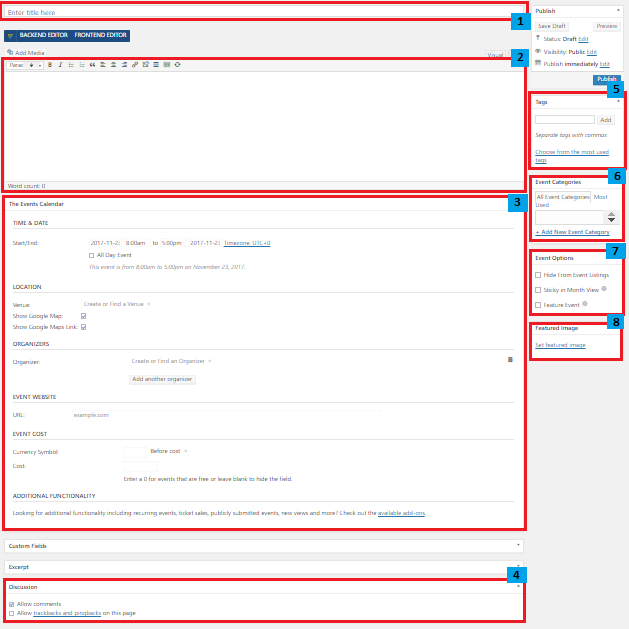
- Title - The name of the event.
- Editor container - You can add the information for the event, like the rules and requirements to attend the event.
- The Events Calendar
- Time & Date - You can set the Time & Date of the event.
- Location - You can Add or select a Venue of the event.
- Organizers - You can Add or select an Organizer of the event. You can set more than one organizer in an event.
- Event Website - You can add an event website if there is one.
- Discussion - Option to allow the trackback/comments section of an event.
- Tags - Specifically categorize an event.
- Event Categories - Group an event with other events in the same category.
- Event Options
- Hide From Event Listings
- Sticky in Month View
- Feature Event
- Featured Image - The Image shown in the listings/pages.
Step 4 - Add all the needed details and descriptions for the event, Once satisfied click on Publish button.
To add events on a page, an element in the Visual Composer is used.
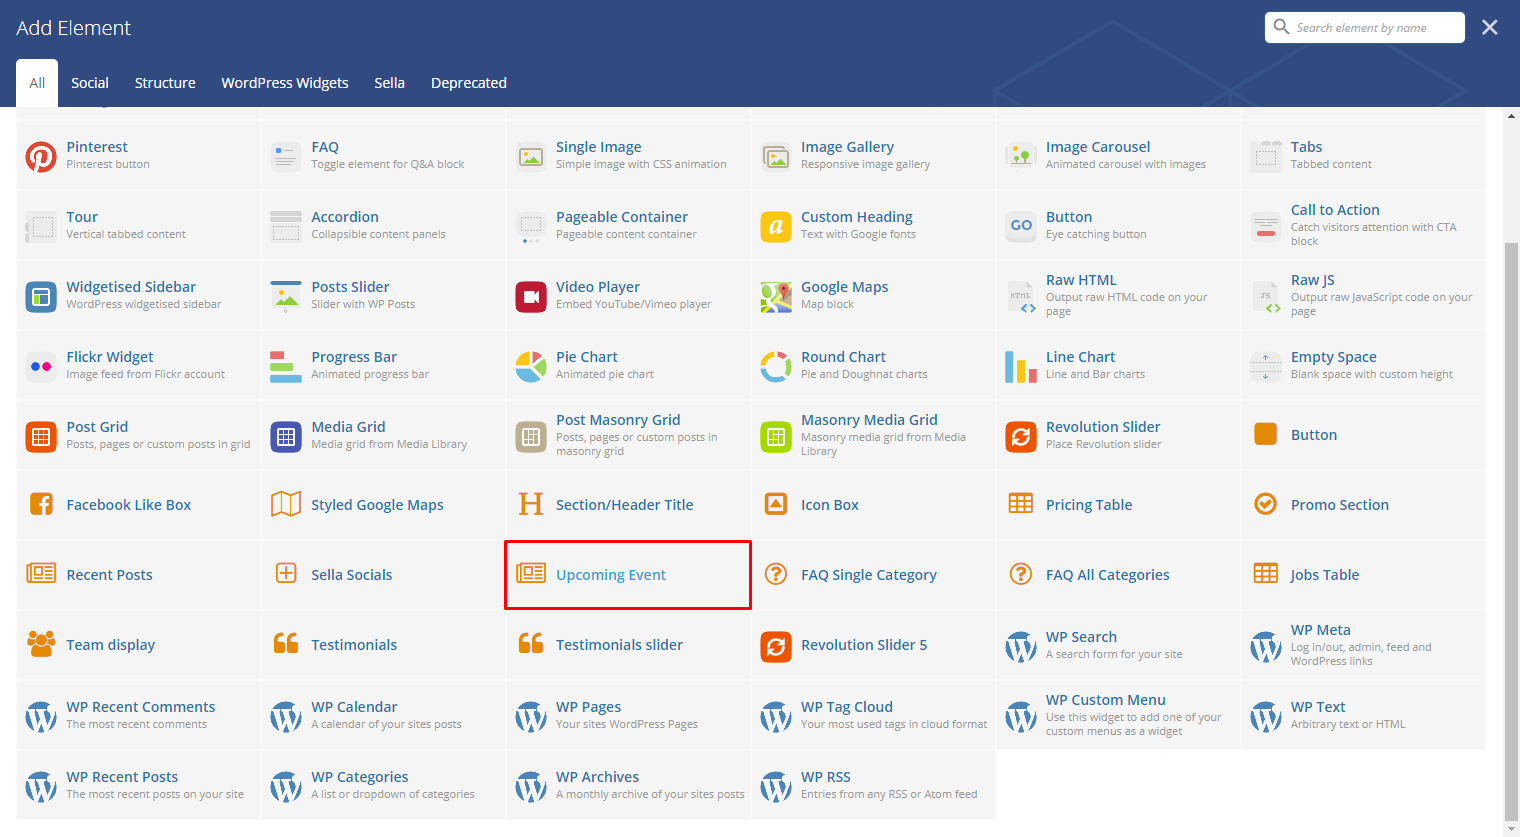
|
This is the element that will add an event on the page. For more information about this element, go to Sella Custom Shortcodes > Upcoming Event.